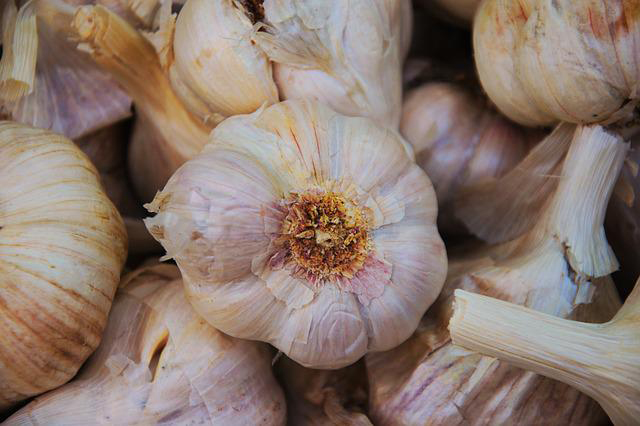
Garlic is divided into two types: hardnecks and softnecks. Hardnecks grow with a hard woody stalk, prefer cooler winters, have a warm to hot spicy flavor, and store for 3 to 6 months. Softnecks have a softer stem suitable for braiding, milder flavor, and store 6 to 9 months.
Planting
Garlic survives bitterly cold winters underground or grows frost-hardy leaves where winters are mild to moderate, grows rapidly when the weather warms in spring, and bulbs in summer. In the north, plant 4 to 6 weeks before the ground freezes. This gives the plant time to make good root development but not enough time to make leaf growth. Where winters are milder, garlic is planted from September through early November.
Garlic needs fertile soil with lots of organic matter so the soil remains loose through the long growing season. Growers with heavy clay soils should add a lot of compost before planting. Those blessed with lighter soils having naturally loose texture need add only small amounts of organic matter, like green manures (cover crop) prior to planting.
Plant garlic in a location with full sun and rich, well-draining soil. Break the bulb into individual cloves. Small cloves usually grow small bulbs, so plant only the larger ones. Use the small cloves in your kitchen. Under each clove, apply 1 tbsp. of Rock Phosphate 0-12-0, Bone Meal 3-15-0 or Fish Bone Meal 4-12-0 along with Kelp Meal 1-0.1-2, or AZOMITE. You could also use a complete mix such as our Rose & Flower Mix 4-8-4 or Vegan Mix 3-2-2. Plant cloves 1 inch deep, pointed tip up. Designate each variety planted with a wooden plant marker. Have at least 4 to 8 inches of space between plants on a raised bed. To grow the largest bulbs, try spacing your plants 6 to 12 inches apart.
Mulch with 3 to 4 layers of overlapping newsprint covered with straw or compost. The new shoots will grow right through the mulch in 4 to 8 weeks depending on the variety planted and the weather. The mulch also suppresses weeds. When active growth begins in early spring, side dress with a high nitrogen fertilizer like Blood Meal 12-0-0, Fish Meal 8-6-0 or high nitrogen Bat Guano 7-3-1. Repeat in late March. Follow in late April and late May with a high phosphorous such as Bone Meal 3-15-0 or Fish Bone Meal 4-12-0.
Garlic should not be planted with peas and beans. Good companions are lettuce, beets, strawberries, and chard. Rotate the crop and do not grow in soils where onions or other alliums were planted the previous year.
Care
Even in the dry west, garlic needs little irrigation as it grows mainly during the wet season, although some irrigation maybe necessary in dry spells. Garlic needs about an inch of water each week during spring growth. Stop watering by June 1 or when leaves begin to yellow, and let the bulbs firm up.
The state of the garlic’s foliage is the indicator for harvest, not any particular date. Gauging the right time to harvest is very important. Dug too soon, the skins won’t have formed around each clove. Hard-neck bulbs, if dug too late, may have begun to spread apart in the soil and will not store well. Each year the timing is a little different so rather than watch the calendar, observe the plants. Hard-neck varieties put up a tall, woody flowering stalk that usually grows bulbils at the top. If the plant is allowed to put its energy into these seeds, the bulb forming below the ground will end up smaller, so cut seed stalks off as soon as the flower head has reached 8 to 9 inches tall. The top of the plant, called garlic scapes, make delicious additions to stir fry, or spicy good pesto!
Garlic is fairly easy to grow and bothered by few pests. Occasionally a grazing deer will nip the growing tips in the spring. Disease-wise the biggest problem is root rot in poorly drained soils, or from over watering.
Harvest & Curing
As the bulbs mature the leaves brown off. When there is still about 50% of green leaves remaining on the plant, it is a good time to harvest. (Incidentally, immature bulbs that haven’t fully developed skins around their cloves can be chopped up like onions and make delicious additions to cooking.) In very good garlic ground (very fluffy soil) the plants might be pulled by hand, but it is usually better to loosen the soil first with a spading fork. Immediately brush off the soil from around the roots, but do this gently.
Drying is the essential part of curing the bulbs, so do not wash them in water. Immediately move the newly dug garlic out of direct sunlight. When curing, some growers tie the garlic plants by their leaves or stalks in loose bundles of 8 to 12 plants and hang them under cover. Others spread the plants in single layers on screens, drying racks, or slatted shelves. You can attach your wooden plant marker or a label to bunches or drying racks to keep track of your different varieties.
Garlic stores longer if it is cured with its stalk or leaves attached. Good air circulation is absolutely essential. The plants should cure from 3 weeks to 2 months, depending on the humidity and amount of air circulation. Some growers use a fan in the curing shed.
After curing, you may trim the roots. If the garlic is to be kept in sacks, cut the stalks off 1/2-inch above the bulb and gently clean the bulbs with a soft bristle brush, taking care not to strip off the papery skin.

