Helpful items to have on hand:
- a small bowl for activating your starter
- a container (that is not airtight) to store your activated sourdough starter in (jar, crock, etc.)
- container of purified water kept at room temperature
- an accurate scale to measure out flour and water for feeding the starter
If you love sourdough bread, it’s likely you’re able to easily find it at your local bakery. However, you also have the option of keeping and caring for your own household sourdough starter that can be used over and over again to make fresh, delicious bread at just a fraction of the cost. Sourdough starters use the process of fermentation which increases the lactic acid in the bread dough, giving it that trademark sour taste. Plus, you get the added benefit of it being more easily digestible than other bread made with conventional yeast. Also, making your own bread can be very satisfying! Sourdough starter can be maintained indefinitely, and used in more than just loaves of sourdough bread. You can make pancakes, waffles, pizza dough, and much more!
At Down To Earth, we sell a packet of sourdough starter by Breadtopia. The starter is a dried granular mix of organic wheat flour and wild yeast culture. The company has a website you can reference with handy videos, tips, and recipes to help you in your breadmaking journey! Once you purchase your packet of dried sourdough starter, it is incredibly easy to activate it.
Simple Steps to Activate your Dry Starter:
Step One. Day one. Using a very small bowl, soak 1 ½ tsp dried starter in 1 TBSP lukewarm filtered water for a few minutes. This will soften the granules. Then add 1 TBSP of all-purpose or bread flour, stir, cover with plastic wrap, and let sit at room temperature for 24 hours.
Step Two. Day two. Add 1 TBSP of flour and 2 tsp of lukewarm purified water to the bowl, mix, cover it up again and let it sit for another 24 hours.
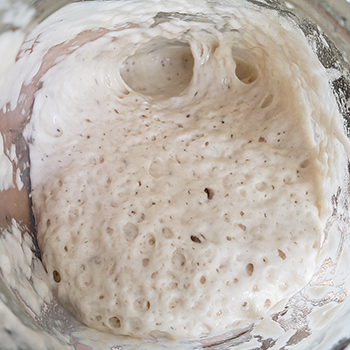
Step Three. Day three. Stir in one more TBSP of flour and just 1 tsp of water this time. Keep an eye on it- in about 12-24 hours you should see some bubbling action that shows that it is fermenting! The warmer your space is, the faster this process will occur.
Step Four. Transfer your starter to a larger container and add 1/3 cup flour and 1/4 cup of water. Within about 12 hours you should have a lively, spongy starter.
Step Five. Continue to build your starter with 1-2 daily feedings. You can double or triple the starter with each feeding. Rather than using equal volumes of flour and water, using approximately equal weight will result in a good starter consistency.
Caring for and Maintaining your Sourdough Starter:
- Be sure to feed your starter equal weights of flour and water (This equates to roughly 2/3 to 3/4 cup of water for every cup of flour.) Having a good scale handy is invaluable for breadmaking!
- When it’s sensible, you want to double the amount of starter with each feeding, especially if you are bulking it up to use in a recipe. If your recipe calls for much less than what you have, just pull out about a cup of starter and double what is left in your container. This is generally called the discard. But don’t throw it away! Make some delicious pancakes or crackers. There are lots of great ideas on the internet to use up any discard starter.
- If you do not bake bread frequently, try not to keep a lot of starter on hand. When you aren’t currently using the starter, keep it stored in the fridge. Simply feed it, and keep it in the refrigerator until ready to use. When you are ready to start baking again, refreshing it is fairly quick and simple!


